Week11 課堂重點
主題:階層性關節轉動
實作:TRT
I 實作
1、照慣例下載Freeglut windows檔案解壓縮


打開project的libglut32.a檔
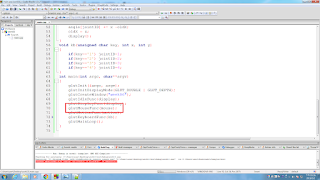
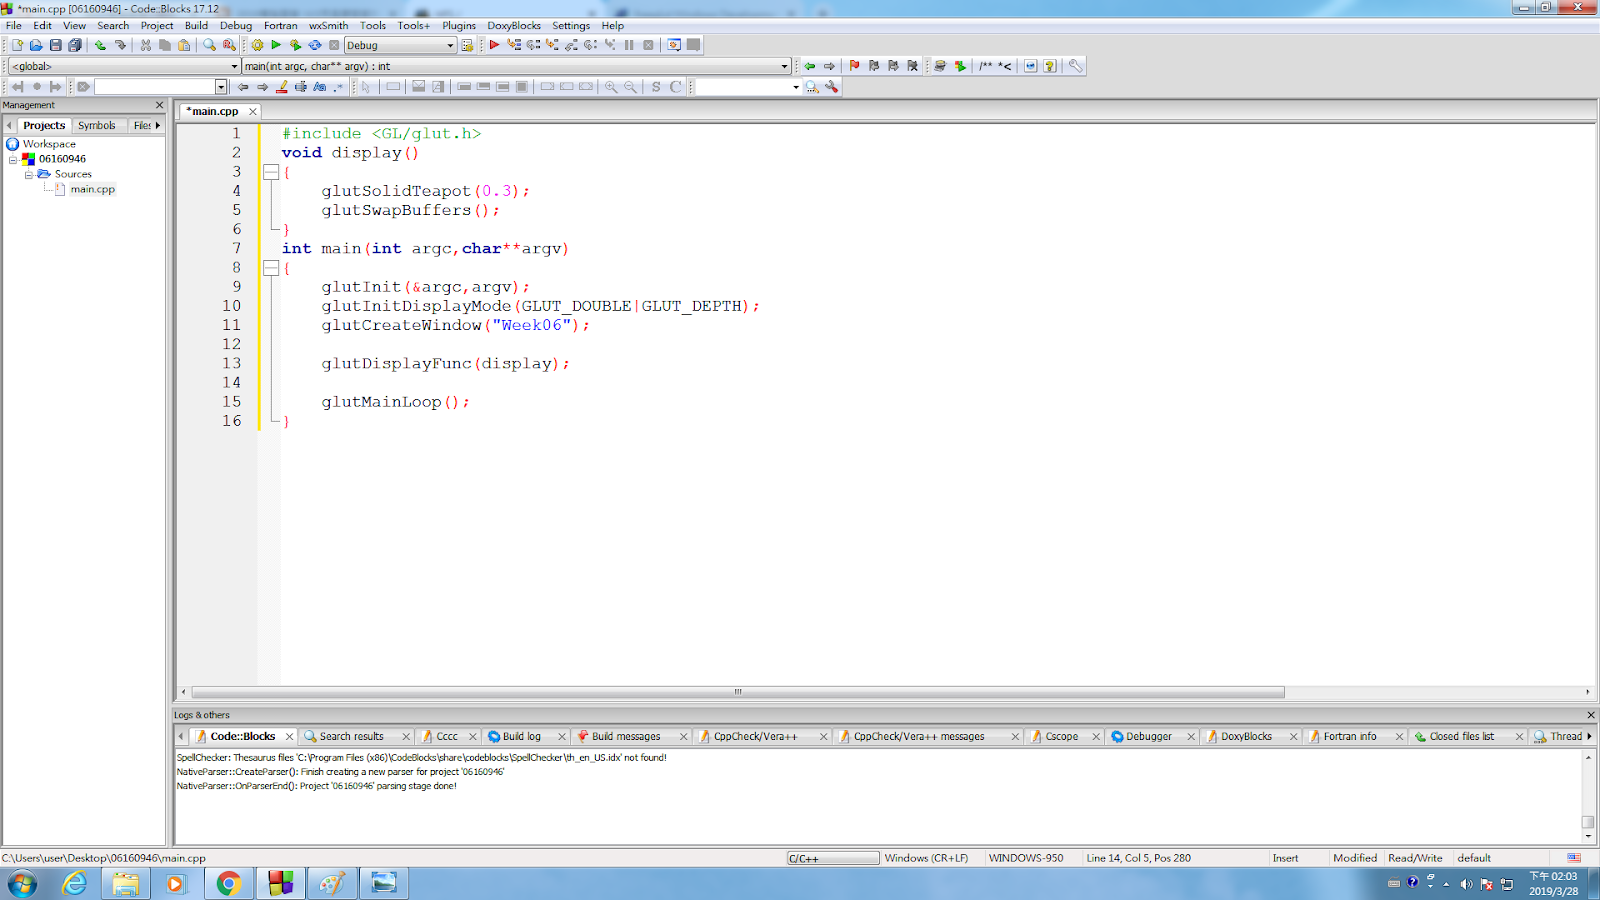
2、刪除glut32中的程式碼鍵入基礎程式碼

#include <GL/glut.h>
void display()
{
glClear(GL_COLOR_BUFFER_BIT | GL_DEPTH_BUFFER_BIT);
glutSolidTeapot( 0.3 );
glutSwapBuffers();
}
int main(int argc, char**argv)
{
glutInit(&argc, argv);
glutInitDisplayMode(GLUT_DOUBLE | GLUT_DEPTH);
glutCreateWindow("week06");
glutDisplayFunc(display);
glutMainLoop();
}
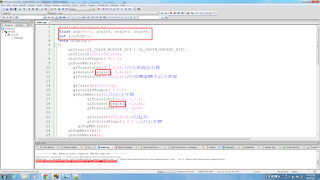
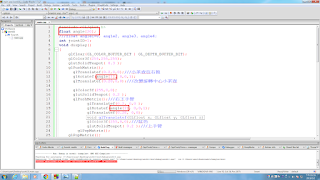
3、練習TRT如圖
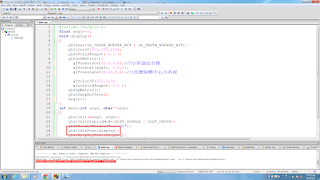
加上程式碼
glPushMatrix();///右邊的手臂
glTranslatef(0.2, 0,0 );///往右移動
glRotatef(angle, 0,0,1);///旋轉
glTranslatef(0.28, 0,0);///中心點右移
glColor3f(255,0,0);///紅色
glutSolidTeapot( 0.2 );
glPopMatrix();
最下面加上glutIdleFunc才會轉動
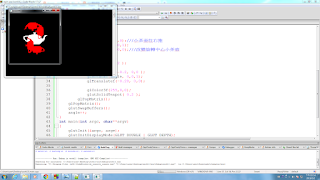
4、成果


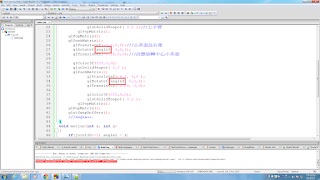
5、多加幾隻

接在原glPushMatrix();
glPopMatrix();裡
glPushMatrix();///右下手臂
glTranslatef(0.2, 0,0 );
glRotatef(angle, 0,0,1);
glTranslatef(0.28, 0,0);
glColor3f(255,0,0);
glutSolidTeapot( 0.2 );
glPopMatrix();
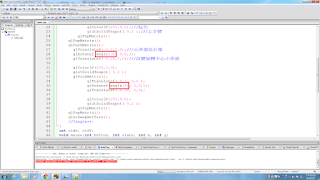
左邊複製右邊的改glTranslatef裡的負號如圖

6、成果
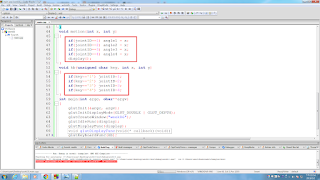
7、改成左右旋轉幅度對稱
且跟著滑鼠移動
把左邊的旋轉角度加個負號如圖
跟著滑鼠移動加上glutMotionFunc(motion);如圖
8、成果

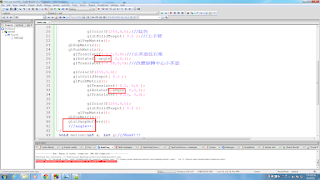
9、分開各個關節轉動
設定4個關節
加上鍵盤跟滑鼠控制的設定
加上glutKeyboardFunc(kb);程式才會知道(如圖)
成果

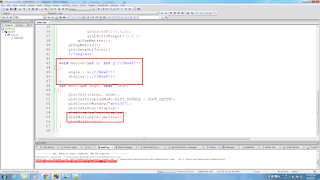
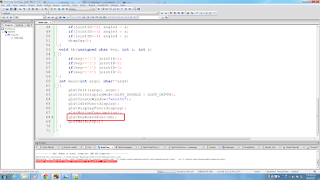
10、用矩陣設定多個變數
更改motion移動後再繼續移動不用回到初始值
從更新的位置繼續如圖
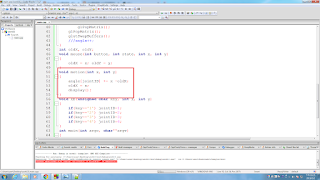
void motion(int x, int y)
{
angle[jointID] += x -oldX;
oldX = x;
display();
}
加上滑鼠按下按鍵紀錄如圖
void mouse(int button, int state, int x, int y)
{
oldX = x; oldY = y;
}
記得加上 glutMouseFunc(mouse);
成果


打開project的libglut32.a檔
2、刪除glut32中的程式碼鍵入基礎程式碼
#include <GL/glut.h>
void display()
{
glClear(GL_COLOR_BUFFER_BIT | GL_DEPTH_BUFFER_BIT);
glutSolidTeapot( 0.3 );
glutSwapBuffers();
}
int main(int argc, char**argv)
{
glutInit(&argc, argv);
glutInitDisplayMode(GLUT_DOUBLE | GLUT_DEPTH);
glutCreateWindow("week06");
glutDisplayFunc(display);
glutMainLoop();
}
3、練習TRT如圖

加上程式碼
glPushMatrix();///右邊的手臂
glTranslatef(0.2, 0,0 );///往右移動
glRotatef(angle, 0,0,1);///旋轉
glTranslatef(0.28, 0,0);///中心點右移
glColor3f(255,0,0);///紅色
glutSolidTeapot( 0.2 );
glPopMatrix();
最下面加上glutIdleFunc才會轉動
4、成果


5、多加幾隻

接在原glPushMatrix();
glPopMatrix();裡
glTranslatef(0.2, 0,0 ); glRotatef(angle, 0,0,1); glTranslatef(0.28, 0,0); glColor3f(255,0,0); glutSolidTeapot( 0.2 );
glPopMatrix();
左邊複製右邊的改glTranslatef裡的負號如圖
6、成果
7、改成左右旋轉幅度對稱
且跟著滑鼠移動
把左邊的旋轉角度加個負號如圖
跟著滑鼠移動加上glutMotionFunc(motion);如圖
8、成果
9、分開各個關節轉動
設定4個關節
加上鍵盤跟滑鼠控制的設定
加上glutKeyboardFunc(kb);程式才會知道(如圖)
成果
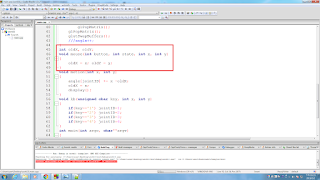
10、用矩陣設定多個變數
更改motion移動後再繼續移動不用回到初始值
從更新的位置繼續如圖
void motion(int x, int y)
{
angle[jointID] += x -oldX;
oldX = x;
display();
}
加上滑鼠按下按鍵紀錄如圖
void mouse(int button, int state, int x, int y)
{
oldX = x; oldY = y;
}
記得加上 glutMouseFunc(mouse);
成果
左邊複製右邊的改glTranslatef裡的負號如圖

6、成果

7、改成左右旋轉幅度對稱
且跟著滑鼠移動

把左邊的旋轉角度加個負號如圖
跟著滑鼠移動加上glutMotionFunc(motion);如圖

8、成果

9、分開各個關節轉動


設定4個關節
加上鍵盤跟滑鼠控制的設定

加上glutKeyboardFunc(kb);程式才會知道(如圖)

成果

10、用矩陣設定多個變數


更改motion移動後再繼續移動不用回到初始值
從更新的位置繼續如圖

void motion(int x, int y)
{
angle[jointID] += x -oldX;
oldX = x;
display();
}
加上滑鼠按下按鍵紀錄如圖

void mouse(int button, int state, int x, int y)
{
oldX = x; oldY = y;
}
記得加上 glutMouseFunc(mouse);

成果

沒有留言:
張貼留言