WEEK08 2019/4/11
主題: 貼圖 Texture
開啟範例:Texture.exe
2.下載data,win32,glut32.dll (3個檔案)

3.把window解壓縮

4.data的資料夾移至window

5.glut32.dll也移至window

6.開啟 Texture.exe (右手定則:逆時針方向設頂點)
註:glTexCoord2f(gl Texture Coordination 2個浮點數)
通常固定(0.0 , 0.0)/( 1.0, 0.0)/( 1.0, 1.0)/( 0.0, 1.0)


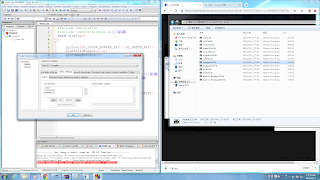
2.執行,選擇路徑(後兩個)


11. 在search directions那欄的complier新增C:\OpenCV2.1\include 然後按ok


3. 放在 C:\openCV2.1 並安裝

4.安裝好後再開啟CODEBLOCKS!!

5.開啟glut專案(檔案位置記得存!!!!!!!!)
6.搜尋freeglut window下載Download freeglut 3.0.0 for MinGW
7.複製檔案位置
8.複製libfreeglut.a--->改成libglut32.a
9.把GLUT的main.cpp裡的程式全部刪掉,改成

#include <GL/glut.h>
#include <opencv/highgui.h>///貼圖
void display()
{
glClear(GL_COLOR_BUFFER_BIT | GL_DEPTH_BUFFER_BIT);
glutSolidTeapot(0.3);
glutSwapBuffers();
}
int main(int argc, char**argv)
{
IplImage *img=cvLoadImage("earth.jpg");///貼圖
cvShowImage("opencv Window",img);///貼圖
cvWaitKey(0);///貼圖
glutInit(&argc,argv);
glutInitDisplayMode(GLUT_DOUBLE|GLUT_DEPTH);
glutCreateWindow("06160531_Week08!!");
glutDisplayFunc(display);
glutMainLoop();
}
10.在Project裡選擇Build options


12. 在search directions那欄的linker新增C:\OpenCV2.1\lib 然後按ok

13.在Linker Settings那欄新增cv210/cxcore210/highgui210然後按OK

14.執行

期中考:10行OpenGL程式


沒有留言:
張貼留言